Arduino Leonardo Cartridge Reader#
Extracting the data of a P2000T SLOT1 cartridge is a simple matter of connecting to the cartridge and reading the internal ROM chips, very much in the same manner as the P2000T machine itself would do it. Obviously, we would like to do this in a non-invasive manner, i.e., without opening and/or damaging the original cartridge.
Note
This page discusses a cartridge reader solution using the Arduino Leonardo. Another option is to use the P2000T adapter plate together with the PICO SST39SF0x0 Programmer.
To this aim, an Arduino Leonardo HAT (HAT stands for “hardware attached on top”) is developed that can be nicely inserted into the sockets on the Arduino as shown in Figure 51. On mounts the cartridge onto the socket and uses a simple Python script (explained below) to read from the cartridge.
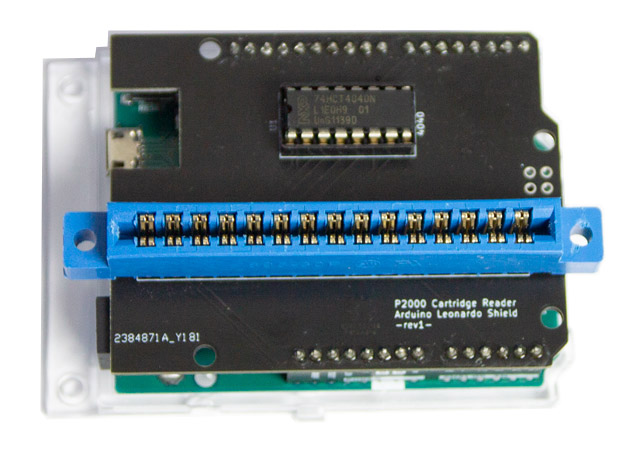
Fig. 51 Arduino Leonardo HAT#
Schematic#
In Figure 52, the schematic of the cartridge reader is shown. As the Arduino Leonardo does not
have enough pins for both the address as well as the data lines on the cartridge, we have to use
some additional logic chips. One could use for example shift registers, but here we have opted for
using the 4040 chip as an efficient counter to set the values on the address lines.
The 4040 chip sets the first 12 address lines and the Arduino Leonardo is responsible for the
remaining A12 line as well as the CARSEL1 and CARSEL2 signals. These latter three lines effectively
set the internal A12 and A13 lines on the ROM chips. The details of this mapping can be found
here.

Fig. 52 Arduino Leonardo based cartridge Reader schematic.#
The CCLK and CRES lines correspond to the clock and reset lines of the 4040 chip, the former
resulting in the chip counting up and the latter resetting the address lines. Finally, D0-D7 are
connected to the data lines on the cartridge.
Preparing the Arduino Leonardo#
To allow the Arduino Leonardo to interface with the cartridge, first some firmware has to be written
to the cartridge. The firmware can be found in the Github repository.
Download the repository and open arduino/cartridge_reader_firmware/cartridge_reader_firmware.ino using the Arduino IDE. (see Figure 53)
Ensure that the correct board is set via Tools > Board > Arduino Leonardo. Next, test that firmware compiles by clicking
on Sketch > Verify/Compile (shortcut: CTRL + R). If everything compiles, you can upload the firmware to the Arduino by
clicking on Sketch > Upload (shortcut: CTRL + U). Your Arduino is now ready to receive instructions.
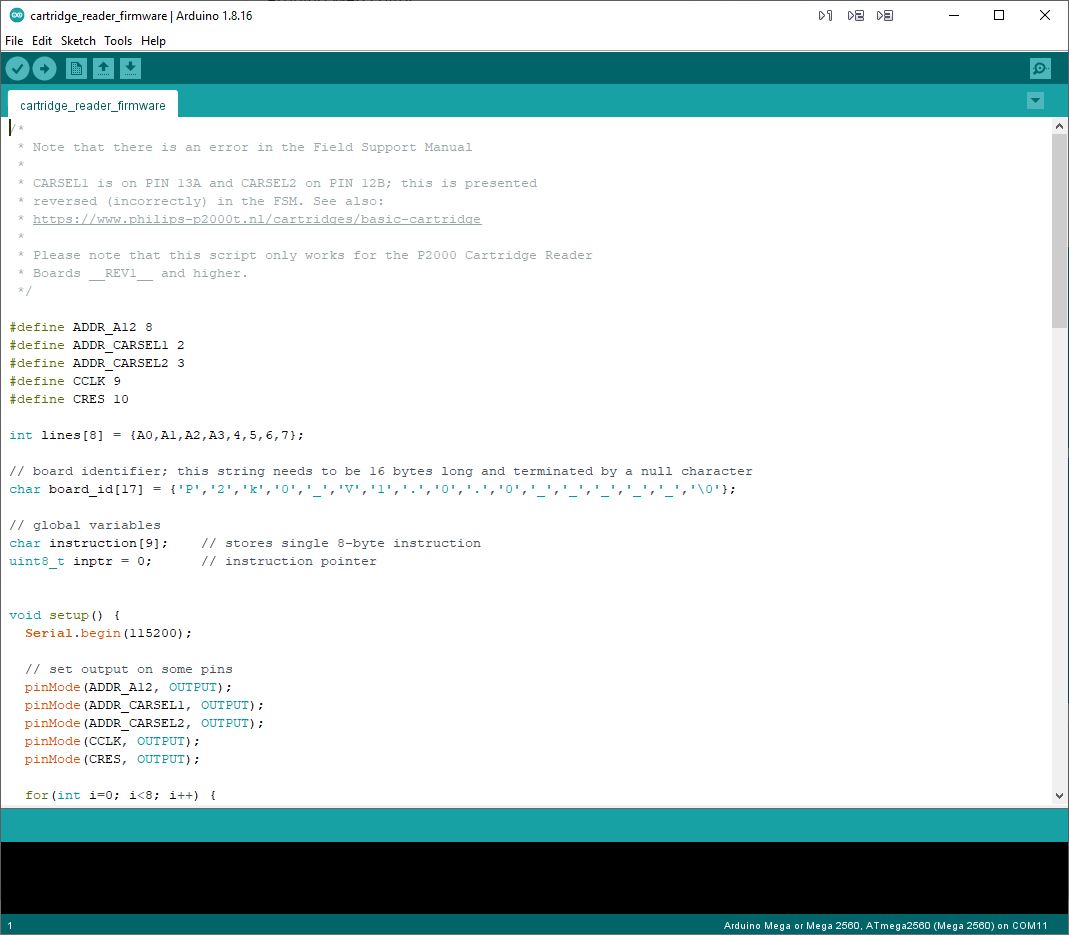
Fig. 53 Screenshot of the Arduino IDE.#
Reading from a cartridge#
To extract the data from the cartridge, mount the cartridge such as shown in Figure 54.
Caution
Ensure that the front side of the cartridge is facing away from the 4040 chip. In other words,
the front side of the cartridge is on the same side as the POWER and ANALOG IN pins of the
Arduino Leonardo.
The Arduino Leonardo communicates with your computer over its serial port. It receives 8-byte command words after which a certain operation is conducted. A number of Python scripts are provided in the repository to show how the interfacing works. It is recommended to run the Python scripts from an IDE environment such as Spyder. Spyder can be easily installed as part of the Anaconda package which is essentially a complete and bundled Python environment.
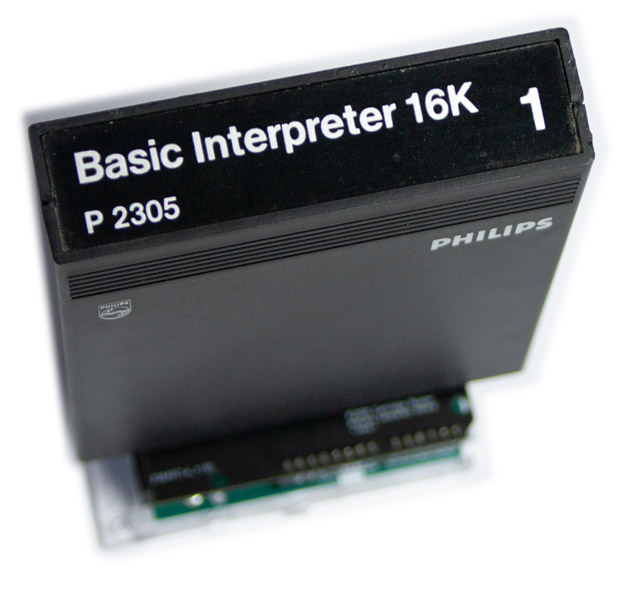
Fig. 54 Cartridge mounted on the cartridge reader.#
Before reading any cartridges, it is important to first test that your cartridge reader is properly working. To this aim, two important tests need to be executed as explained below.
Testing the interface#
To test the interface, open scripts/serialtest.py and execute it. What the script does is automatically find
the COM port to which the Arduino Leonardo is connected, open that port and send the command
READINFO to the Arduino. The response should be an echo of the command followed by a string
identifying the firmware (typically something like P2k0_V1.0.0_____). The result of the test should
look as follows:
.
----------------------------------------------------------------------
Ran 1 test in 0.018s

OK
Testing reading from cartridges#
The next test is actual reading from a cartridge. For this test, you need to have a (copy of) the
BASICNL v1.1 ROM. Mount this cartridge into the cartridge reader and open the file
scripts/comparison_test.py. Similar to serialtest.py, this test first tries to find the
PORT to which the Arduino Leonardo is connected, after which it opens the port and verifies
that the READINFO command can be executed. If this works, the program will read the complete
cartridge by reading 4 times 0x1000 (4kb) of data. Effectively, the scripts sends the commands
RB000000, RB001000, RB002000, RB003000, each invoking a read operation wherein 0x1000
bytes are read starting at the address designated in the command. After echoing the command back,
the data follows as a binary stream. These binary streams are collected and combined into a
large bytearray. Finally, a MD5 checksum is generated of this bytestream and verified whether
this checksum matches the one of the BASICNL v1.1 ROM cartridge.
The result of this test should look as follows:
.
----------------------------------------------------------------------
b'P2k0_V1.0.0_____'
Reading bank 0
Reading bank 1
Reading bank 2
Reading bank 3
.
----------------------------------------------------------------------
Ran 1 test in 1.159s

OK
Reading data and storing result#
If the previously explained two tests gave satisfactory results, you are ready to actually read
from a P2000T SLOT1 cartridge. For this purpose, the Python script scripts/readrom.py has been
designed. Similar to the previous two scripts, this script opens an interface to the Arduino Leonardo,
executes the read operations and collects the result. The collected bytestreams are stored
in a file called rom.bin which can be found in the same folder as where the readrom.py resides.
Below, example output is provided when executing this script for the BASICNL v1.1 ROM. To get a first impression on the content of the ROM, the first 256 bytes are printed in hexadecimal notation.
b'P2k0_V1.0.0_____'
Reading bank 0
Reading bank 1
Reading bank 2
Reading bank 3

First 256 bytes read:
5E FB 0F 00 80 52 6F 62 52 6F 62 38 33 02 00 00
C3 66 1F C3 E6 60 C3 C4 1F 1C 86 8D 50 48 49 4C
49 50 53 20 43 41 53 53 45 54 54 45 20 42 41 53
49 43 04 03 02 83 56 65 72 73 69 65 20 31 2E 31
86 4E 4C 04 05 02 86 00 C9 00 C3 C0 60 C3 3A 19
C3 D0 60 C3 48 15 C3 5A 1F C3 4F 17 C3 E2 16 C3
C3 60 C3 18 19 C3 53 1D C9 00 00 C9 00 00 C3 63
24 C3 F3 14 C3 2C 15 C3 30 13 CD 30 13 D0 CD 3E
11 3E 50 18 CE 2A B3 60 EB 2A AD 60 19 F5 7C 87
87 84 67 7D 6C 26 05 29 29 29 29 22 B1 60 85 6F
30 01 24 F1 C9 CB 3E 38 03 23 77 C9 CB 3E 5F 23
56 38 16 1D 15 2A AF 60 7D BA D8 7C BB D8 7B 32
B4 63 EB 22 B3 60 C3 3E 11 B7 C8 AF 6F 4F 14 1D
28 01 0C F3 A9 D8 D8 D3 50 43 2D 20 01 15 28 04
10 F8 18 F0 FB 3E 07 18 10 3A B4 60 3C 32 BD 60
3E 03 01 3E 0D E1 01 3E 1D 32 BC 60 C9 21 BC 60
Tip
Note that all binary files are exactly 16kb in size. To open these files, it is recommended to use a so-called hexviewer. A very nice hexviewer for Windows is HxD. For Linux, one can use the terminal utility hexdump which is available via the packages bsdmainutils or utils-linux.
Source files#
All source files, i.e. the PCB design, the Arduino Leonardo firmware and the casing, can be found in this Github repository.